Great rooms don’t glow by accident. They feel balanced morning to night because residential interior design lighting is planned with as much rigor as cabinetry or architecture. In a luxury home, lighting isn’t a single decision but a system: layers of light, switching and scene control, and integrated shading working together to shape atmosphere, function, and views. When those pieces are coordinated early—alongside furniture layouts, ceiling design, and window treatments—the result is a home that looks composed at noon and magical at dusk.
Lighting design for residences lives at the intersection of art and engineering. It’s about directing attention, revealing texture, and protecting comfort, all while fitting within structural, electrical, and solar realities. This guide walks through how designers build a layered plan, where switches and keypads belong, what to consider for art and decorative fixtures, and how motorized shades and drapery become part of the same conversation—so your home performs as beautifully as it photographs.
Why layered lighting is the backbone of a luxurious interior
Every room benefits from three core layers: ambient, task, and accent. The designer’s job is to proportion those layers to the room’s size, use, and architecture—then align fixtures with real furniture and circulation.
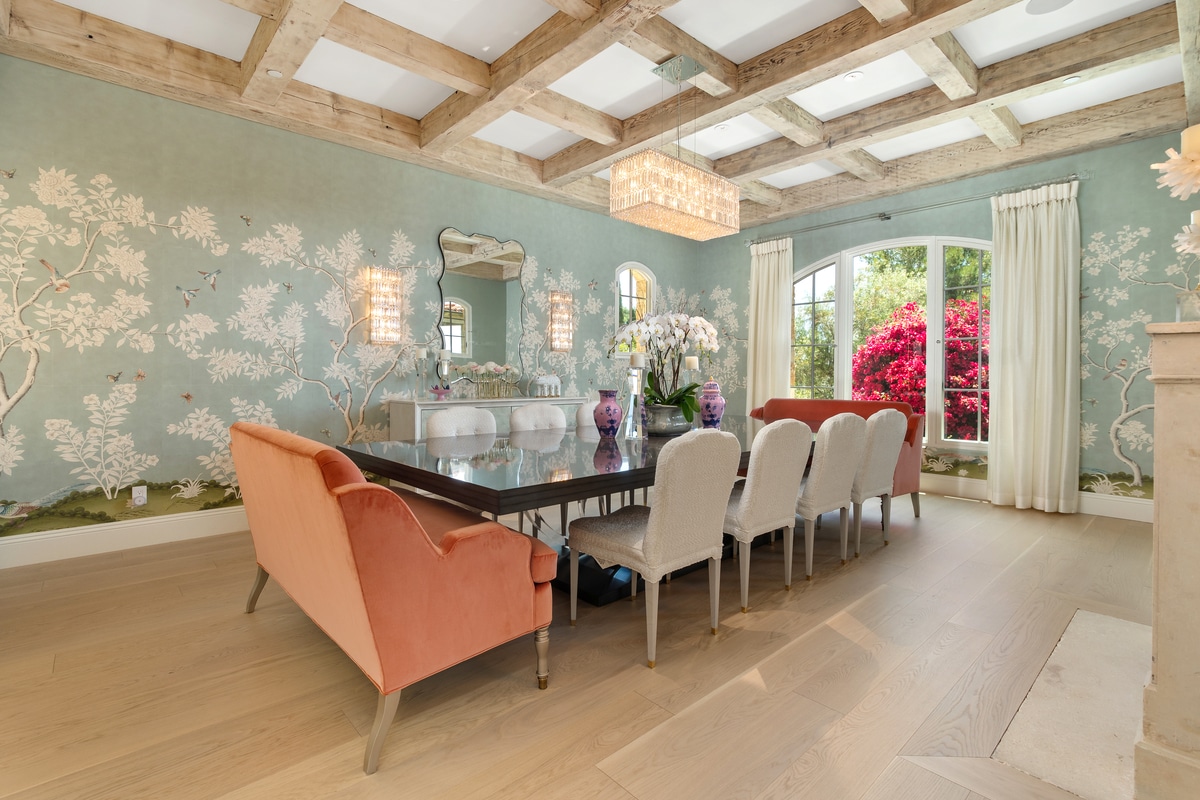
- Ambient light sets overall brightness and comfort. In living spaces, this often comes from recessed downlights or concealed linear sources that bounce soft illumination off ceilings or walls. In rooms with tall volumes or coffered ceilings, ambient strategies are tuned to highlight structure without creating glare.
- Task light supports activities—reading, cooking, grooming, working—and must land exactly where people sit or stand. Pendants at islands, sconces at vanities, portable lamps near seating, and directional downlights over work surfaces all fall here.
- Accent light shapes mood and reveals texture. Adjustable downlights graze stone, picture lights animate art, and concealed LEDs skim millwork or stair treads. Accent lighting is what makes a space feel dimensional rather than flat.
A sophisticated plan doesn’t spray light evenly; it composes light so that brightness steps down as you move from task to relaxation, and focal points guide the eye. The best luxury rooms often read like a well-shot film: no glare, crisp highlights, and shadow used with intention.
Start with furniture, not fixtures
A common mistake is starting with a grid of recessed cans and forcing the furniture beneath it. Reversing the sequence yields a calmer, more luxurious outcome:
- Map conversation groupings first. Where do sofas and chairs land? Once seating is set, place reading lamps and aim adjustable downlights to the shoulder, not the forehead.
- Scale dining tables before specifying chandeliers. Fixture width, drop height, and lumen output follow the table and ceiling proportion—not the other way around.
- Anchor beds in the primary suite before committing to sconces. Backplates align to headboard height and mattress thickness; switch boxes sit at reachable heights from the pillow.
- Plot art walls and display niches early. Picture lights, wall washers, and outlet locations can then disappear into the composition rather than floating aimlessly.
This furniture-first approach lets light serve the life lived in each room, not the geometry of a ceiling grid.
Ceilings, coffers, and the quiet power of reflected light
Luxury lighting often leans on indirect illumination. Instead of flooding a room with overhead brightness, designers use architecture to bounce light for a softer, more flattering result.
- Coffered ceilings can conceal linear LEDs that wash upward, turning the ceiling into a luminous plane and reducing reliance on harsh downlight.
- Perimeter coves create an even glow around a room, great for living areas or entries where you want a sense of volume without visible sources.
- Beam layouts and decorative ceilings should be set in concert with reflected lighting. Aligning pendant centers to coffer axes or furniture groupings keeps the composition calm and symmetrical.
Reflected strategies work particularly well in homes with abundant glass; they counterbalance the contrast between bright windows and interior surfaces, keeping eyes comfortable throughout the day.
Color temperature, dimming, and visual comfort
Light quality is as important as quantity. Two principles matter most in residential interiors:
- Color temperature (CCT). Luxury interiors typically live in the 2700K–3000K range for evening warmth and flattering skin tones. For kitchens and work zones, 3000K can feel crisper while still pairing gracefully with adjacent rooms. Consistency across fixtures maintains harmony; mismatched CCTs can make finishes look discordant.
- Dimming and driver quality. Smooth, flicker-free dimming matters. Pair fixtures with compatible drivers and controls to avoid steps or strobing at low levels. Good dimming preserves color quality as brightness drops, so marble still glows and wood finishes retain depth.
Add beam spread and glare control to the list. Narrow beams punch highlights into art or stone; wider beams bathe surfaces gently. Recessed trims with regress or lenses reduce glare and improve comfort, especially where ceilings are low or seating is close.
Switching and scene control: elegant by design, invisible in use
Switching shouldn’t create visual noise. The goal is intuitive control with minimal wall clutter.
- Group by activity, not just by fixture type. In a great room, a single “Entertain” scene might blend pendants at 70%, sconces at 50%, and coves at 30%, rather than forcing you to toggle four separate circuits.
- Consolidate switches into discreet keypads. Multi-gang banks are replaced with a few labeled buttons—“Morning,” “Cooking,” “Dining,” “Evening,” “All Off.” This is especially helpful near exterior doors and in open-concept spaces.
- Place controls where decisions happen. Bedside keypads should control bedside sconces, reading lamps, and blackout shades; an entry keypad should handle pathway lights and common areas.
- Enable pathways and whole-home off. One-tap pathways (garage to kitchen; primary suite to kitchen) improve safety and experience. Whole-home off at the primary suite ends the day gracefully.
Scene control doesn’t require a full smart-home ecosystem to be effective, but it must be designed alongside the circuiting and fixture schedule. Labels should reflect how you live, not how the electrician wired it.
Decorative fixtures: the jewelry that finishes the composition
Decorative lighting—pendants, chandeliers, sconces, and lamps—does more than add sparkle. It scales rooms, punctuates sightlines, and ties material palettes together.
- Scale to architecture, not just to the table below. In tall entries or great rooms, overscaled fixtures can “cap” a volume and reintroduce human proportion. In intimate rooms, aim for pieces that glow rather than glare.
- Coordinate materials with adjacent metals and finishes—unlacquered brass, bronze, nickel, or blackened steel—so hardware, fixtures, and cabinet pulls read as a family.
- Mind sightlines. A chandelier shouldn’t interrupt a view to the outdoors or a fireplace composition. Align fixture centers to architectural axes picked up in millwork and ceiling details.
- Pair decorative with quiet ambient. Let the decorative star while ambient recedes. Underpowered decorative pieces lead to “add more cans” later; overpowered ones create glare. Balance is key.
Lamps remain the unsung heroes of luxury rooms, forming a human-scale glow around seating. Place them where conversation happens, and let their shades introduce texture.
Kitchen lighting: precision for performance and hospitality
A luxury kitchen must shift seamlessly from workhorse to entertaining backdrop. That calls for multi-modal lighting:
- Task clarity at surfaces. Adjustable downlights over countertops and the range provide shadow-free prep zones. Under-cabinet lighting eliminates dark corners and highlights stone.
- Island pendants deliver both task and statement. Hang in a visually calm number (one or three) and set height to avoid eye-level glare while preserving sightlines.
- Accent moments. Illuminated wall cabinets, bar niches, or a softly lit scullery add depth and mood during evening gatherings.
- Scene logic. Typical scenes include “Cooking,” “Dining,” and “Evening.” Integrate toe-kick or under-shelf lights for late-night navigation without waking the house.
Tie all of this back to the appliance plan, outlets, and switching so the kitchen looks effortless and operates flawlessly.
Bath lighting: flattering, functional, and fog-proof
Bathrooms expose the difference between basic and considered lighting:
- Vanity sconces at face height (often 60–66 inches to center, adjusted for mirror and user height) provide even, flattering light. If ceiling height dictates, a pair of vertical sconces flanking the mirror is ideal; a top-mounted sconce can supplement.
- Ambient softness keeps tile and stone from feeling clinical; consider a dimmable overhead source or soft indirect cove.
- Wet-area safety requires correct ratings for shower fixtures and precise placement to avoid glare on glass.
- Night-mode pathways (toe-kick strips or ultra-low dim levels) make early mornings or late nights gentle and safe.
The payoff is grooming light that flatters while keeping water and glass sparkle in check.
Art, texture, and architectural accents
Accent lighting is where a home whispers luxury:
- Adjustable downlights with narrow beams draw the eye to art, mantels, or stone features. Aim from in front of the piece to avoid hard shadows.
- Grazing techniques bring out movement in plaster, wood slatting, or textured stone. A few inches’ distance from the wall can create mesmerizing depth.
- Picture lights and micro-coves transform corridors into galleries. Integrate power at rough-in so cords never show.
- Stair treads and handrails with integrated LEDs add safety and a sculptural night presence.
These touches are subtle during the day and quietly extraordinary after sunset.
Integrating shades and drapery into the lighting plan
Sunlight is the strongest “fixture” in any room. Treat shades and drapery as part of the lighting system, not afterthoughts.
- Motorized roller shades manage glare and preserve views in spaces with large expanses of glass. Pair light-filtering fabrics for daytime privacy and blackout for bedrooms and media rooms.
- Header pockets and side channels should be designed before framing so shades can disappear when raised and seal properly when lowered.
- Drapery stack-backs must be calculated to keep glass clear; lining and interlining control glow, insulation, and drape.
- Orientation matters. East-facing rooms need gentle morning control; west-facing rooms require more robust glare and heat management in the afternoon.
- Scenes that include shades—“Morning,” “Afternoon,” “Evening,” “Privacy”—make daily life intuitive. Integrate shade control at the same keypad as lighting so you don’t play “switch roulette.”
Coordinating UV protection also preserves fabrics, rugs, and wood finishes, extending the life of everything your lighting reveals.
Outdoor extensions: lighting that respects the night
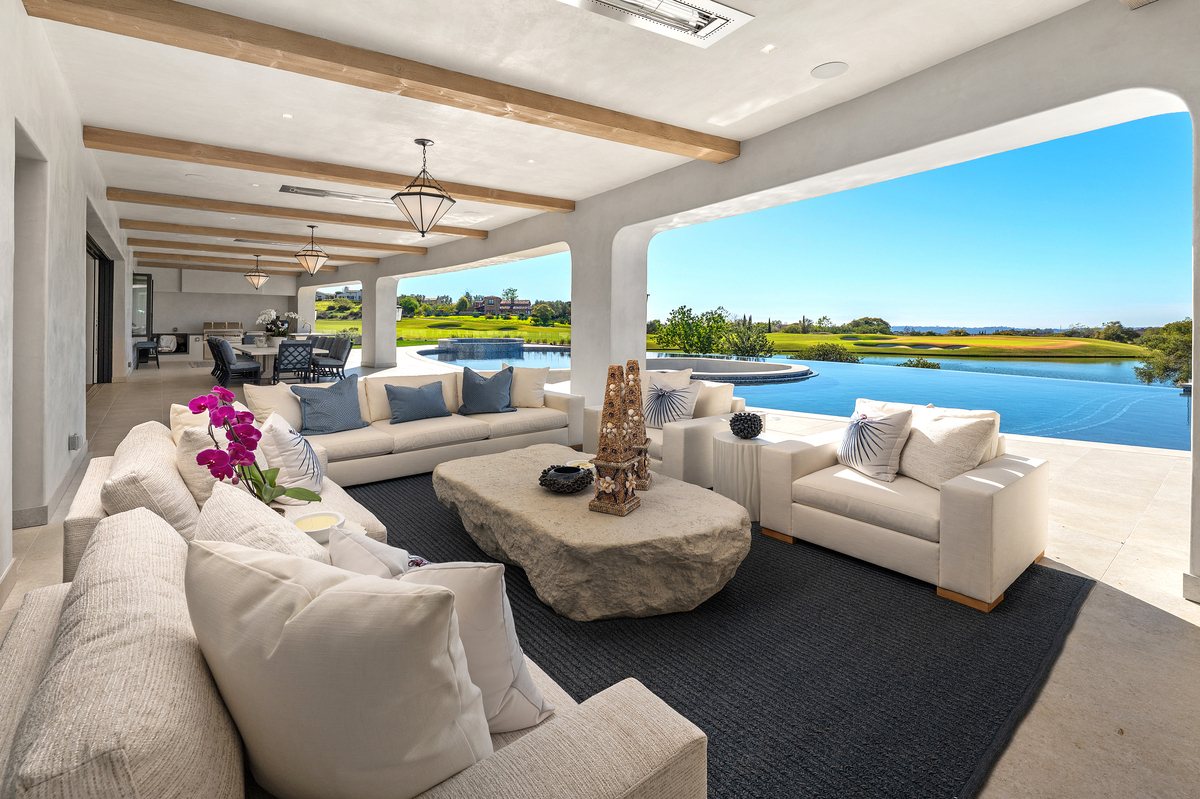
Luxury homes often blur inside and out. Exterior lighting should support that continuity without over-brightening the landscape:
- Layered approach outdoors as well—ambient from soffit or undercap lights, task at cooking or dining zones, and accent to graze stone, palms, or architectural elements.
- Glare control is crucial. Shield sources from direct view to protect dark skies and keep interiors from feeling blown out at night.
- Color consistency between inside and out avoids a jarring shift at thresholds.
- Path and step illumination should feel like moonlight, not runway lights—safe, legible, and calm.
When outdoor scenes are layered thoughtfully, terraces feel like natural rooms rather than floodlit stages.
Common pitfalls—and how professionals avoid them
Even beautiful homes stumble on the same missteps. Professional designers preempt them with drawings, mockups, and coordination:
- Too few circuits. One switch controlling a whole room fights mood-making. Break layers out so scenes have nuance.
- Fixture grids that ignore furniture. Rework plans when layouts shift; don’t leave a downlight hovering over the edge of a sofa.
- Mismatched color temperatures. Vet fixture specs early and keep a consistent palette across rooms that are visually connected.
- Underpowered decorative fixtures. Supplement with quiet ambient rather than adding random cans after the fact.
- No shade pockets. Surface-mount fascias create visual clutter. Integrate headers and side channels while the walls are open.
- Wall acne from switches. Consolidate with keypads and place them where your hand naturally lands.
Attention to these details turns everyday use into a sequence that feels effortless.
How the plan evolves from schematic to installation
Lighting design is iterative, but the milestones are clear:
- Programming & schematic. Establish room functions, furniture layouts, focal points, and daylight patterns. Flag shade strategies for any room with significant glass or sensitive finishes.
- Design development. Draft reflected ceiling plans; locate downlights, coves, and decorative centers relative to architecture and furniture. Develop switching logic and shade pocket details with the build team.
- Specification. Select fixtures (with CCT, beam spread, trim, and driver details) and shade fabrics/hardware. Coordinate loads and compatibility with dimming and control systems.
- Mockups and approvals. Test a few key conditions on site—graze a stone slab, confirm pendant drop, vet shade opacity—before full order.
- Procurement & prewire. Track long-lead fixtures and ensure junction boxes, blocking, and pockets are in place before finishes.
- Focus and scenes. After installation, aim adjustable fixtures, program scenes, label keypads, and fine-tune dimming curves.
- Handover. Provide an illustrated lighting and shade schedule with maintenance notes so performance stays consistent.
This process protects the vision and prevents expensive field improvisation.
Designing for Southern California light and lifestyle
Homes along the coast and throughout Southern California have unique considerations:
- High sun and long daylight call for robust glare management and UV protection—especially for art, rugs, and wood.
- Indoor–outdoor living means thresholds must balance interior mood with exterior legibility; color temperature should drift gracefully from interior warmth to exterior calm.
- Salt air and maintenance favor durable finishes and sealed components for exterior fixtures and hardware.
- Big volumes and glass reward indirect strategies—coves, grazers, concealed lines—that soften contrast during the day and sparkle at night.
A lighting plan shaped by local conditions feels natural year-round, from bright winter mornings to late summer evenings.
The quiet luxury of a well-lit life
When residential interior design lighting is integrated with switching, scenes, and shading, you gain more than pretty pictures. Mornings start gently as shades rise and kitchen counters glow. Dinners feel intimate under pendants with a halo of accent light. Late nights are safe on softly lit stair treads. Art reads as intended, materials reveal their true depth, and views remain the star when you want them to be.
The essence of luxury is ease—and nowhere is ease more palpable than in how a home handles light. With layered illumination, intelligent control, and thoughtful shade integration, your spaces won’t just look better; they’ll live better, every hour of the day.
Interior Design Articles